Epoxy Painting Kitchen Countertops To Look Like Marble

Can you paint kitchen countertops to look like marble?
Absolutely! This simple step-by-step tutorial will show you how to paint your formica, laminate or even old granite kitchen countertops to look like marble, including the exact materials and paint you need.
About a year and a half ago, I decided to give my countertops a makeover by painting them to look like marble. Today I’m sharing how to paint your kitchen countertops, and what the best countertop paint kit is to use.
Update: How long do painted countertops last? Three years later, our marble-looking countertops have still held up, and I have been in love with my kitchen countertops ever since.
This post contains affiliate links, meaning I may or may not make a commission on a purchase at no extra cost to you.
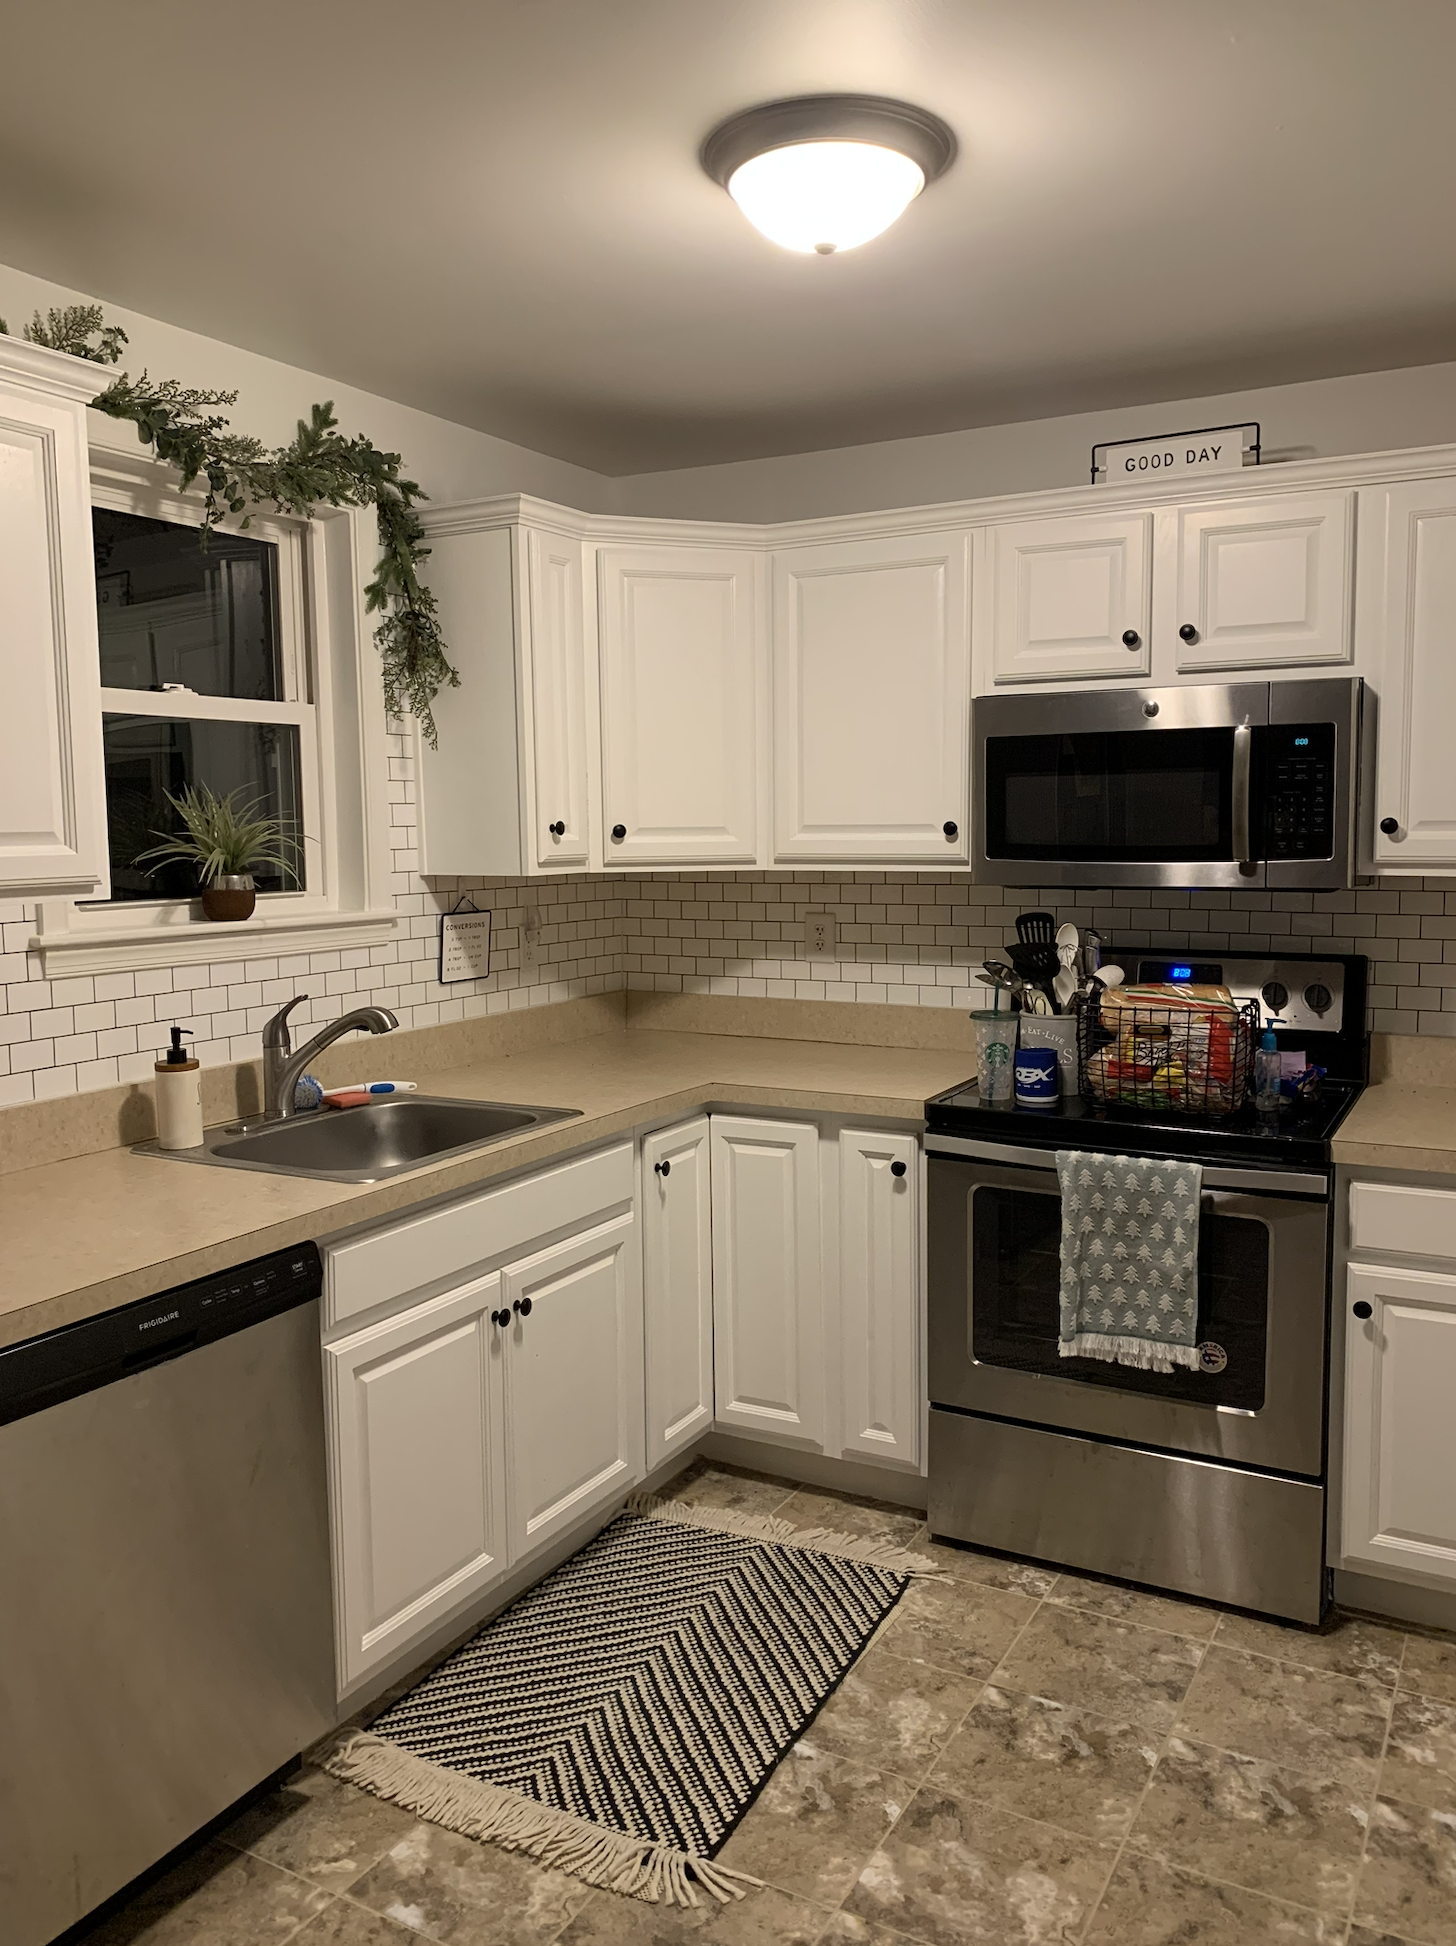
Before KitchenCountertop Paint Kit
After Marble Kitchen Countertop Paint

What Countertop Paint Kit Should You Use?
Before I originally painted my kitchen countertops, I did a small kitchen renovation for under $350 by painting our kitchen cabinets, adding backsplash and new hardware. You can check that post out here, and everything I used!
Let me start out by saying I used the Giani Countertop Paint Kit from Amazon. It has almost 2,000 4.5 star ratings.
You can get many different colors and styles of countertop paint such as granite, but I preferred the look of the marble countertop paint kit. It’s under $200, and looks pretty real from afar.

GIANI MARBLE EPOXY COUNTERTOP PAINT KITThis marble countertop paint kit comes with everything you need such as:
Rollers,
Roller pads
Brushes
Veining paint
Primer
Highlighter paint
Drop cloths
600 grit sandpaper
Paint stirring sticks
Gloves
Epoxy
Sponge
Spray bottle
Step by step instructions.
You will just need to supply your own painters tape. It is also safe for indoor use and has little to no smell.
Painting these formica/laminate countertops took a total of 2 days, but took about 5-7 days to fully cure.
So when you're finished, make sure you don't place anything on your countertops for about a week or so. I just used the stovetop for any kitchen activity.


How To Paint Countertops To Look Like Marble
Step 1: Prep Your Kitchen and Counters
First start by taping off your kitchen with painters tape as well as taping on the drop cloths to your counters that are included in the kit. Prep the counters first by using the 600 grit sandpaper to get rid of any bumps, grease, debris.
They will be dusty after this process.
Step 2: Apply the base primer
Once your formica/laminate counters have been sanded and wiped down, you are ready to begin painting!
Your first coat will probably look hideous. I was quite skeptical at first, but keep applying as many coats of primer paint until you get to your desired white color. I think mine took about 3 or 4 coats. The photo below was the first coat and I was so nervous.

PRO-TIP: The drop cloths were great for my entire kitchen, keeping the marble paint from getting on the kitchen cabinets, appliances, and floor.

Step 3: Paint the marble veins
I thought that this would be the most daunting part of the countertops. It can be quite nerve-racking because you want to make the perfect vein. However, just remember, it's just paint! If you don't like how your vein came out, just paint over it with the primer and try again.
PRO TIP: For this project, I found it best to search for photos of white marble countertop veining to get some ideas on what types of movement to make.
Use your small artistic brush included with your kit, and draw away! Don't let the veins dry, because you'll want to distress them. Make sure to paint each vein one by one, then do step 4 (see below) after each vein.
To be honest, at first I when I looked at my kitchen counters, I didn't like the amount of veining I had, so I added more, and got sloppy.
It seemed the sloppier I made my veining, the more natural of an appearance they seemed to have.

Step 4: Distress the marble veins
Make sure to just paint one vein at a time, as you don't want them to dry so that you can distress them.
To distress them, take your spray bottle filled with water that comes with your kit, and start spritzing over the paint.
Once the water has been applied, take your larger paint brush, and dab overtop of the wet paint and water. This will start to spread the paint out, and have it bleed out making the veining look more natural.
Distress to your desired look. There is no right or wrong way! You can also use the sponge for texture.
I even applied some highlight paint with the small artistic brush to lighten some spots of them.


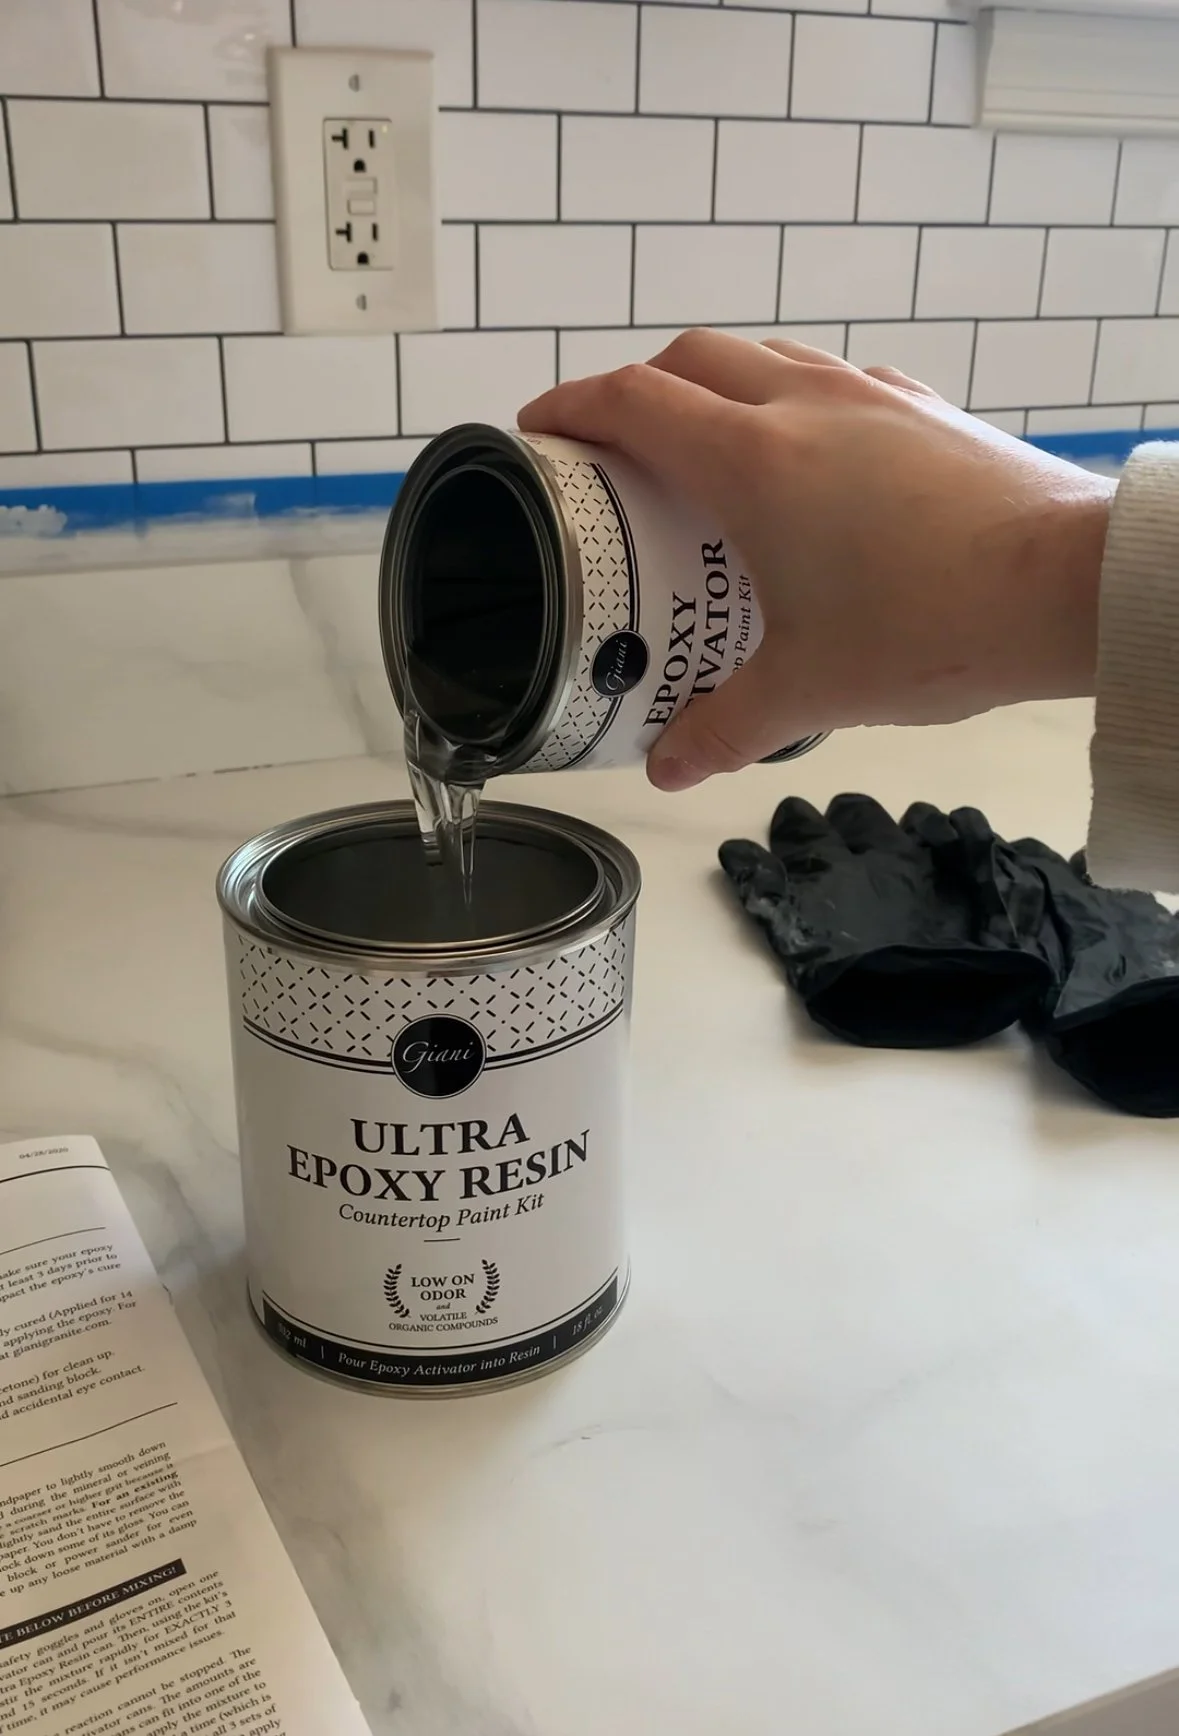
Step 5: Mix the epoxy activator into the epoxy resin
Using your gloves, pour the entire small can of the epoxy activator into the epoxy resin and mix with the paint stirrers for about 3 full minutes.
Once mixed, you can start so slowy drizzle the epoxy mix over the countertops one section at a time.
Step 6: Apply the mixed epoxy coat
This was the most daunting part because it's timed.
Once the epoxy activator (small can) has been mixed with the epoxy resin (large can) you have 30 minutes to roll it out.
If not completed within 30 minutes the epoxy will start to thicken and get sticky making your countertop texture no longer able to be rolled on.
When working on this part, make sure you will have no interruptions.
Check that there are no hairs/dust sitting anywhere or even the smallest of air bubbles will appear once the clear coat is applied.
Use your paint rollers to smooth it out, and get complete coverage. It will drip a lot. This is where the drop cloth sheets become very useful.
Continue to do this across all sections of the countertops.


Step 7: Wait to cure
At this point, you have finished painting your kitchen countertops!
It will take about 2 days to fully dry without feeling sticky, and about 5-7 days to cure without making an indents.
Related post: 5 Budget Upgrades That Made My Kitchen Farmhouse Style
Finished Kitchen Marble Counter Results


GIANI MARBLE EPOXY COUNTERTOP PAINT KITAll in all, I give the Giani Countertop Paint Kit a 5 star rating. Although painting countertops won't last forever, ours has lasted about 3 years so far (Makeover photos below), and we saved thousands of dollars. If I'm being transparent, the super reflective shine has dulled down a bit, but really that's about it.
I'm not rough in my kitchen, and always use cutting boards, so we have no chipping yet or discoloration. I also constantly make sure to clean them with soap and water, and no chemicals.

Related post: How I Completely Flipped My Kitchen For Under $350